close
logo
Rstest
指南
配置
API
English
简体中文
指南
配置
API
English
简体中文
logo
Rstest

开始

介绍
快速上手
功能导航

基础

命令行工具
配置 Rstest
过滤测试
VS Code 扩展

进阶

调试
性能分析

迁移

从 Jest 迁移
📝 在 GitHub 上编辑此页
上一页调试
下一页从 Jest 迁移

#性能分析

#使用 Rsdoctor

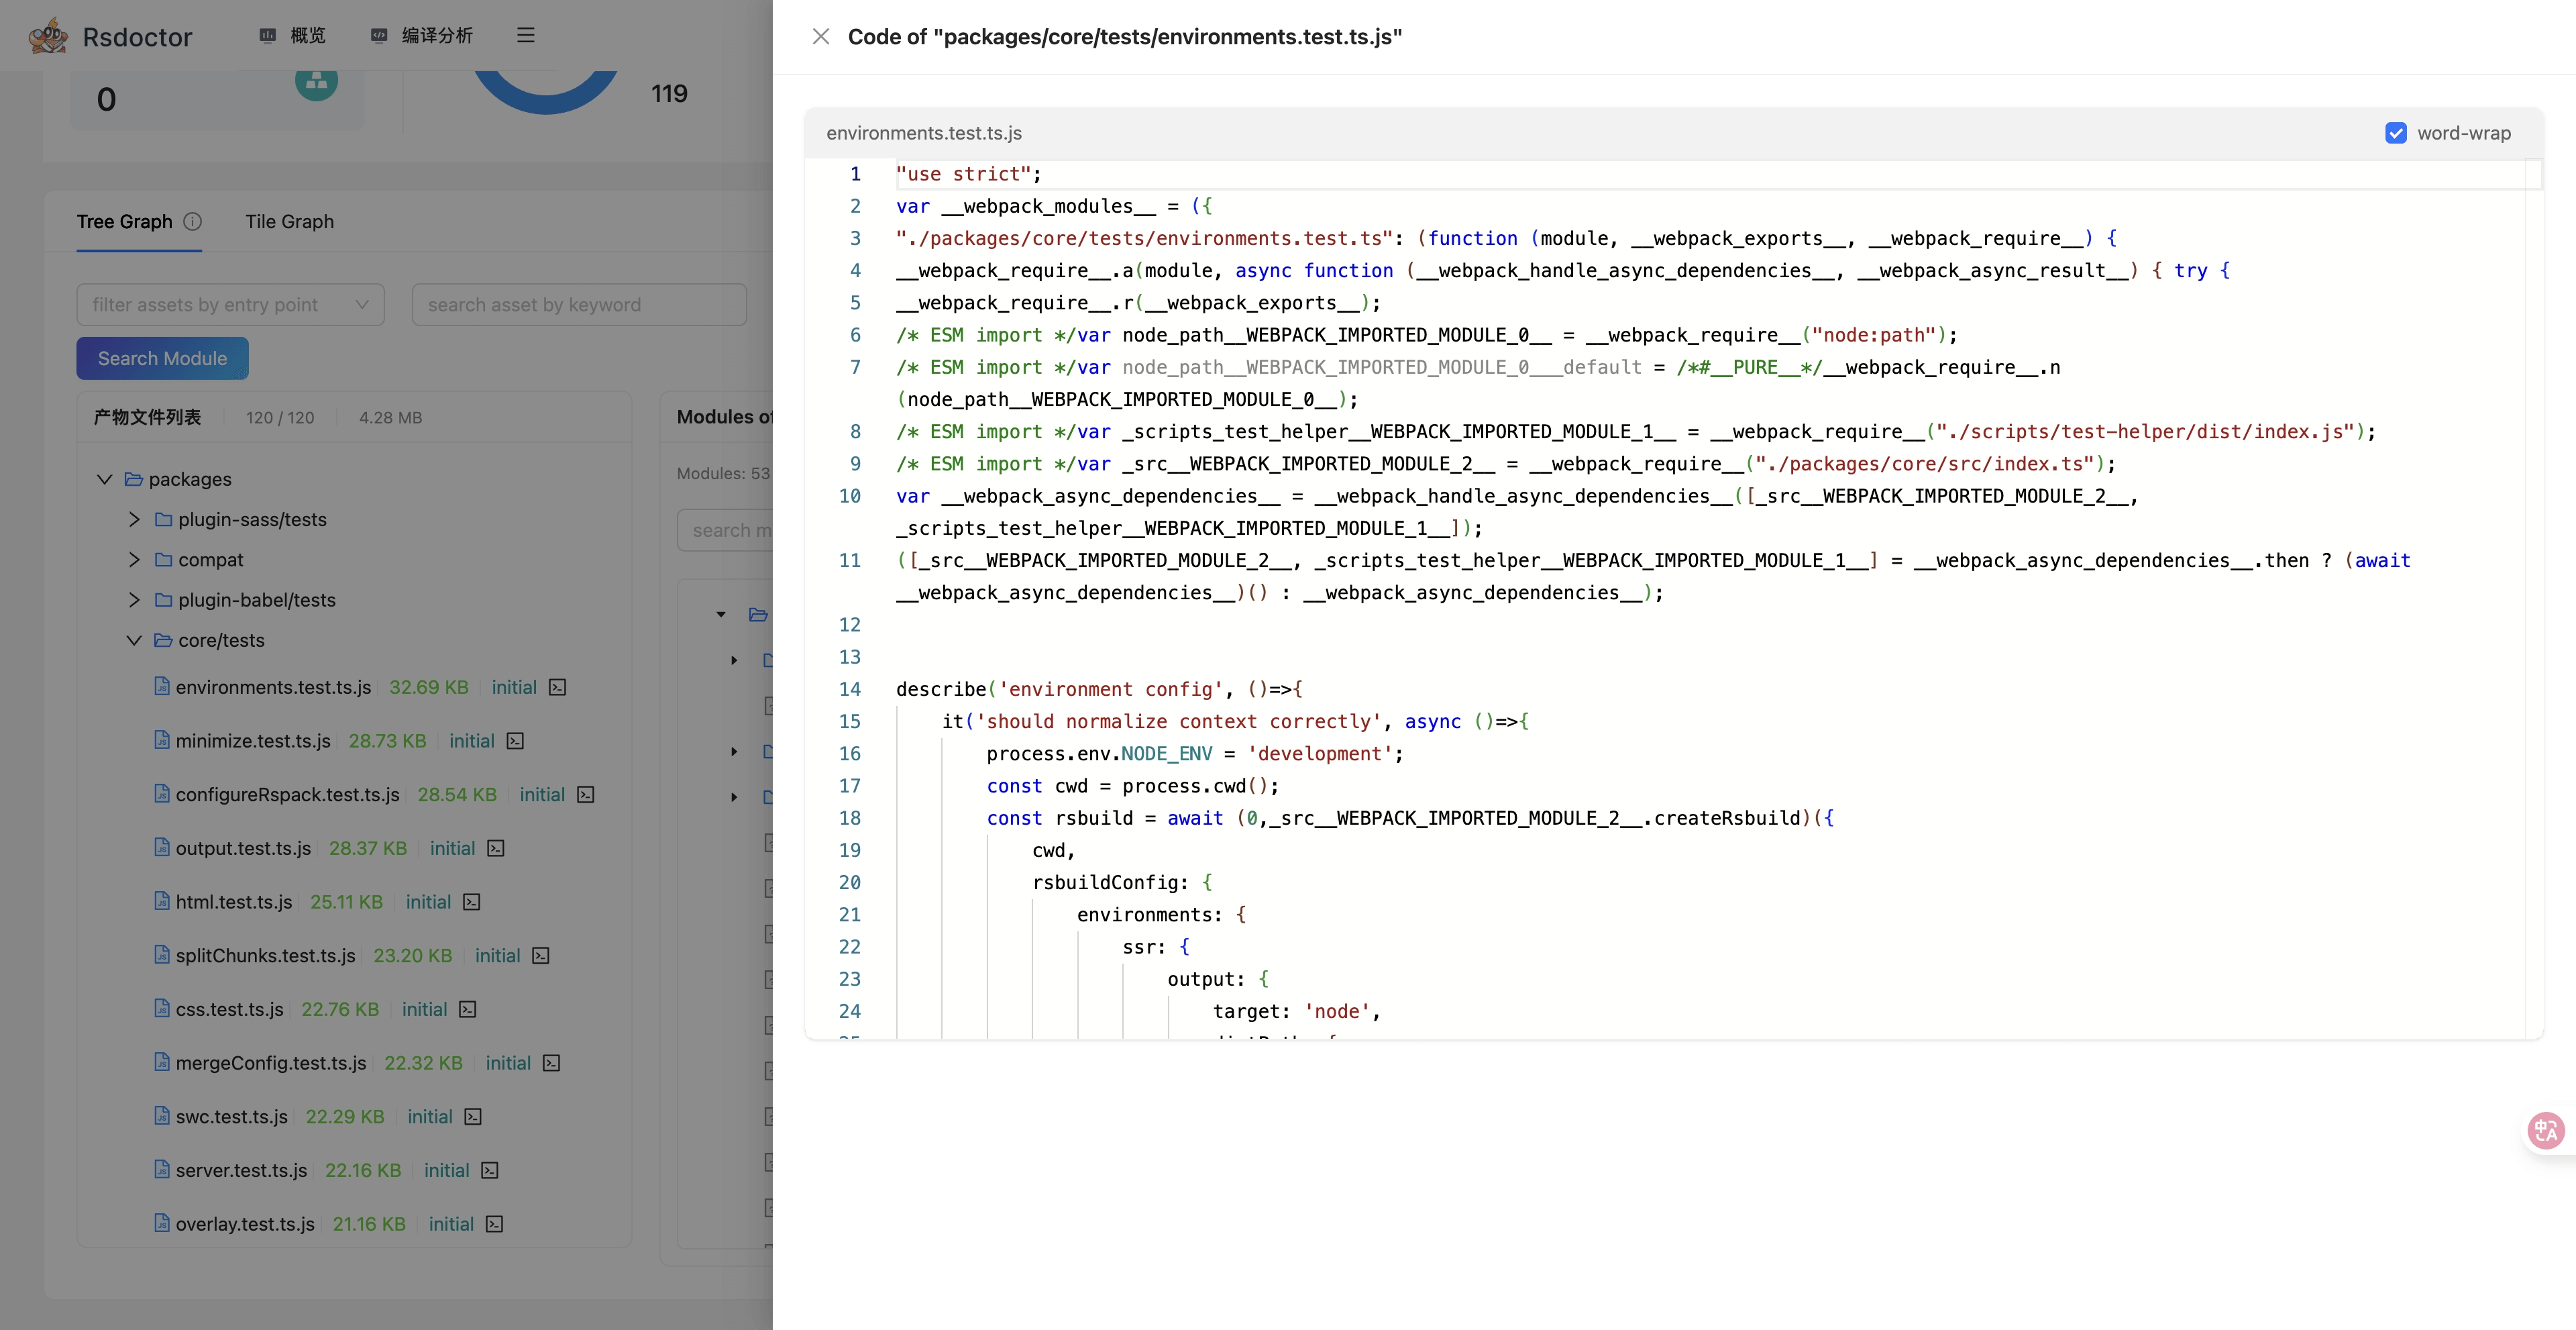
Rsdoctor 是一款为 Rspack 生态量身打造的构建分析工具。

当你需要调试 Rstest 的构建产物或构建过程时,可以借助 Rsdoctor 来提升排查问题的效率。

#快速上手

在 Rstest 中,你可以通过以下步骤开启 Rsdoctor 分析:

  1. 安装 Rsdoctor 插件:
npm
yarn
pnpm
bun
npm add @rsdoctor/rspack-plugin -D
  1. 在 CLI 命令前添加 RSDOCTOR=true 环境变量:
package.json
{
  "scripts": {
    "test:rsdoctor": "RSDOCTOR=true rstest run"
  }
}

由于 Windows 不支持上述用法,你也可以使用 cross-env 来设置环境变量,这可以确保在不同的操作系统中都能正常使用:

package.json
{
  "scripts": {
    "test:rsdoctor": "cross-env RSDOCTOR=true rstest run"
  },
  "devDependencies": {
    "cross-env": "^7.0.0"
  }
}

在项目内执行上述命令后,Rstest 会自动注册 Rsdoctor 的插件,并在构建完成后打开本次构建的分析页面,请参考 Rsdoctor 文档 来了解完整功能。

rsdoctor-rstest-outputs

#CPU profiling

#Samply

注意:为了能在 macOS 中对 Node.js 侧代码进行 profiling 需要 22.16+ 版本。

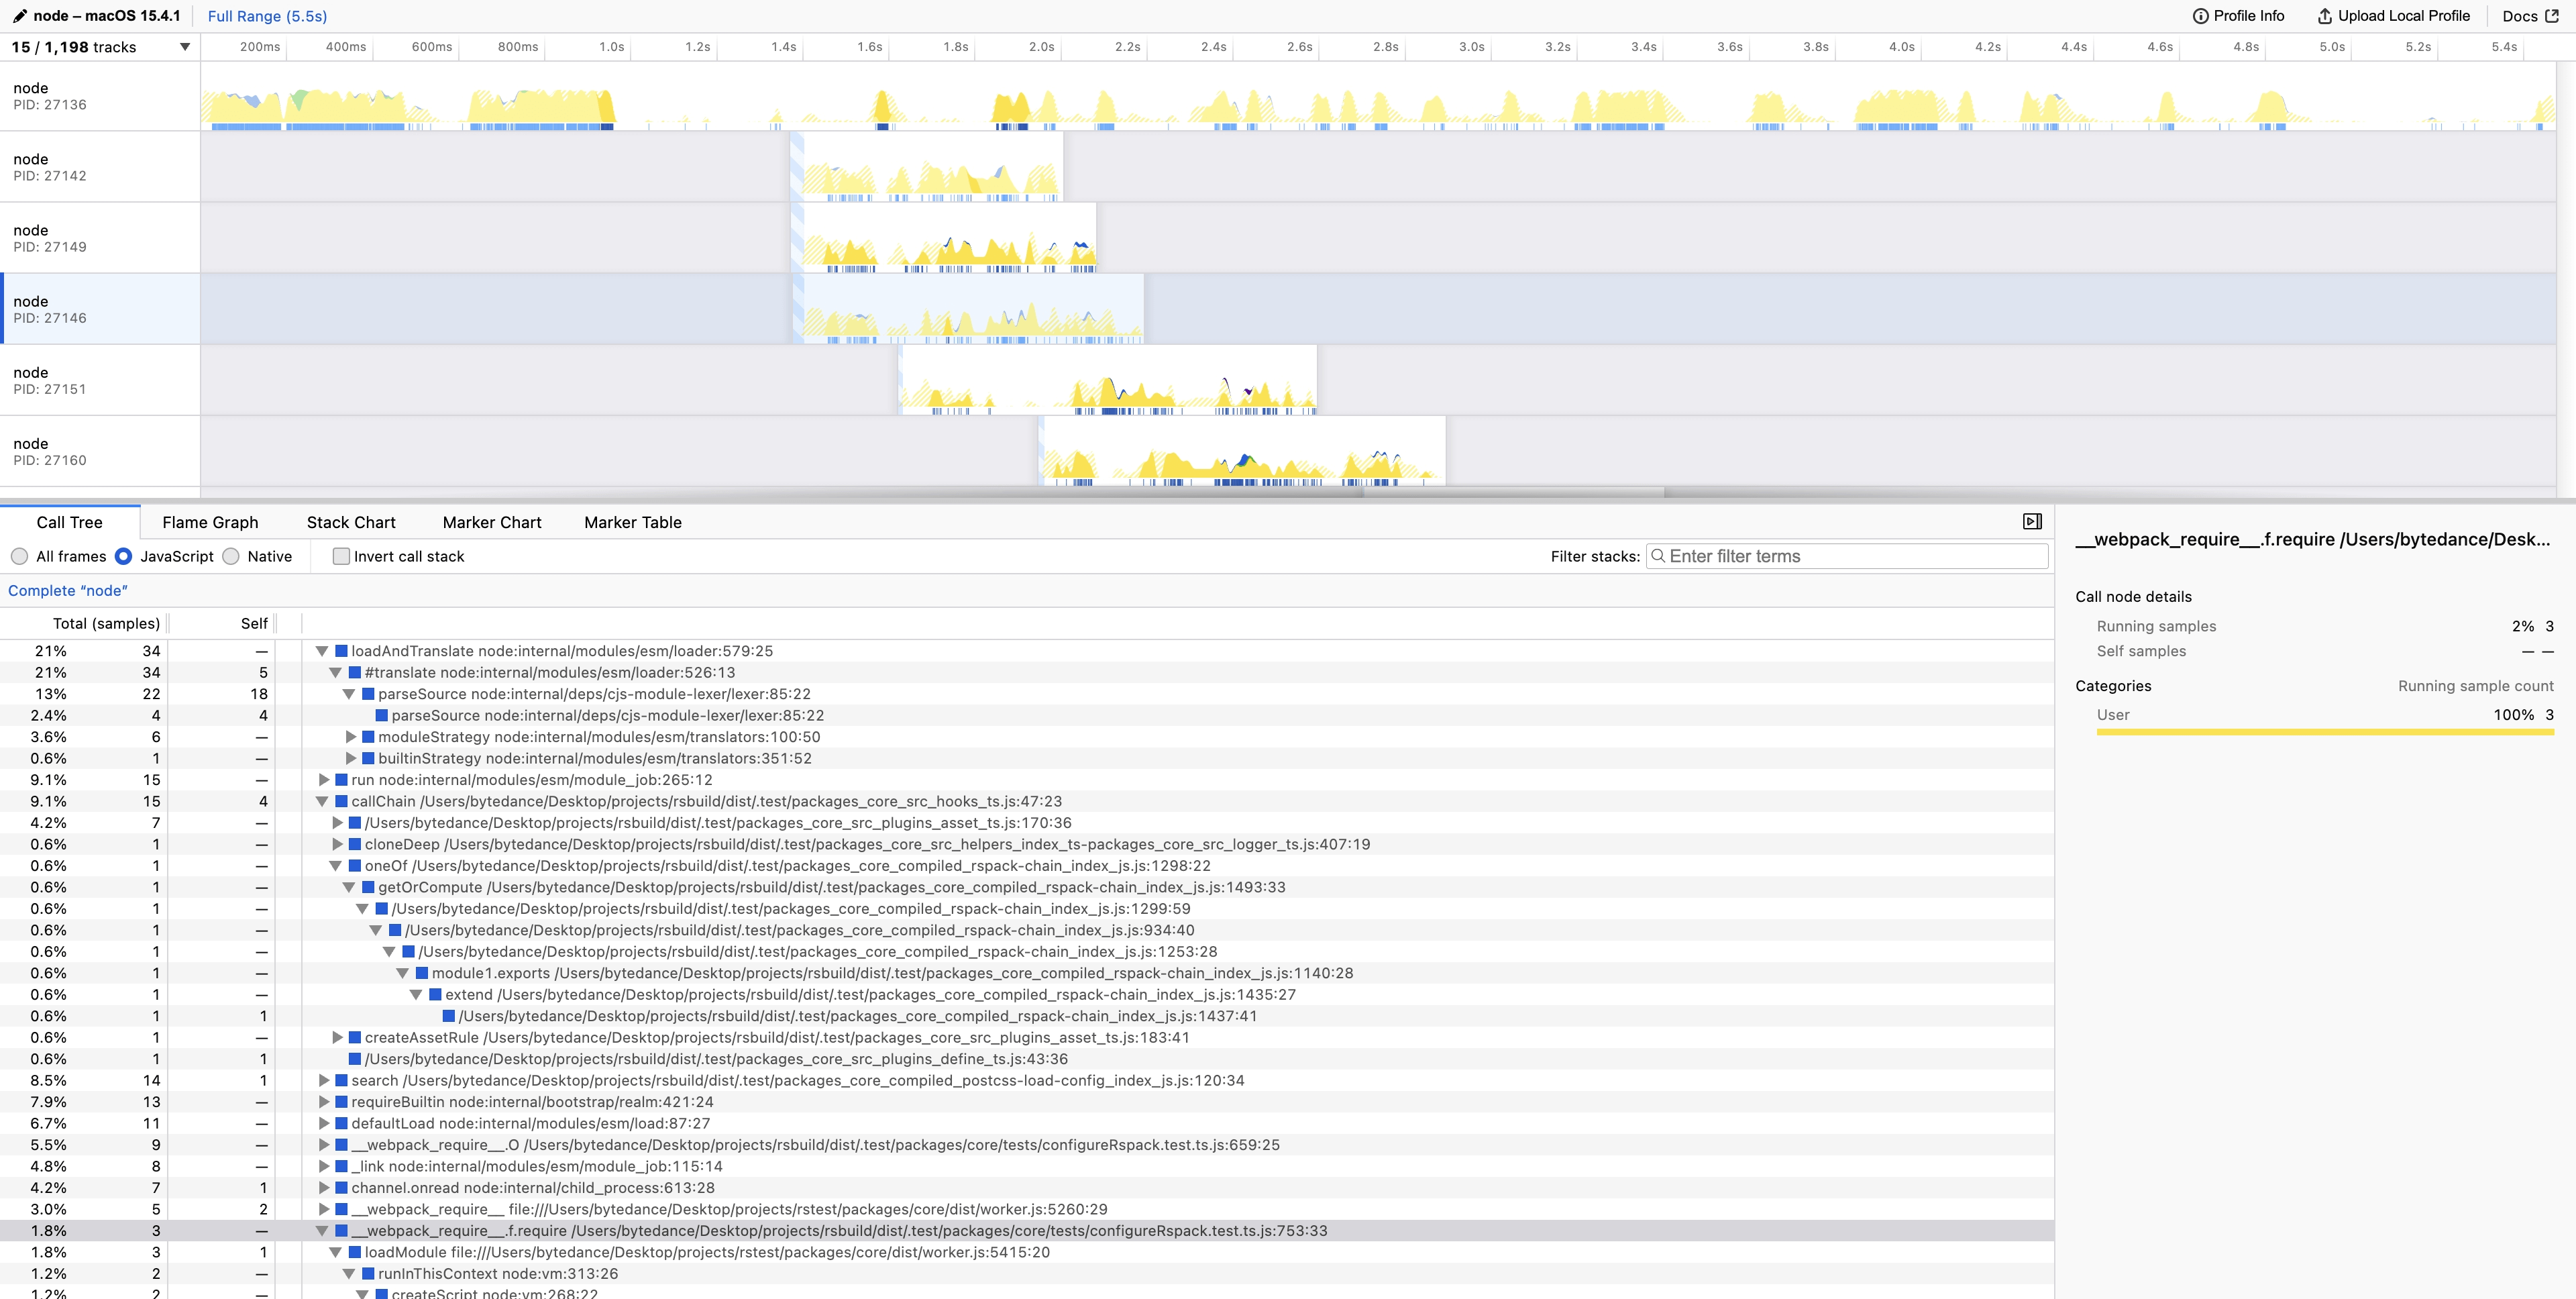
Samply 支持同时对 Rstest 主进程和测试进程进行性能分析,可通过如下步骤进行完整的性能分析:

运行以下命令启动性能分析:

samply record -- node --perf-prof --perf-basic-prof --interpreted-frames-native-stack {your_node_modules_folder}/@rstest/core/bin/rstest.js

命令执行完毕后会自动打开分析结果。

Rstest 的 JavaScript 代码通常执行在 Node.js 线程里,选择 Node.js 线程查看 Node.js 侧的耗时分布。

rstest-samply-profiling